 I have been making bags this year. I got the pattern this little make-up bag this fall and have made about 20 of them so far. I gave a bunch away at Christmas time. I thought I would post a bunch of pictures of the bags and then try to rearrange the pictures - thanks to Patty from Texas who offered some advice. So this is a bit of a test post.
The bags are easily made with two fat quarters - one full fat quarter is needed and then the inside lining is just 1/2 of a fat quarter and then there is a small inside pocket and a ribbon to close. I think it's just a great little pattern to use up some of those fat quarter packages of mine.
 This next bag is a pattern I found in one of the Better Homes and Gardens quilting projects magazines quite a few years ago. I really like this bag. It has four little pockets on the outside and the inside is quite big - again a make-up travel bag. It is quite complicated to make! At least for me, and requires a bit more fabric than a couple of fat quarters. But I really like this bag. I have made a couple of these over the years. The very first one I made was for Andrew's girlfriend Emma ( when he was 15) she was going away to India for a holiday with her parents and I made her a bag to take with her.
 These next bags are again using up my fat quarter collection. It was a pattern that came with the fat quarter fabrics on the left - the purple/yellow/green fabrics. I discovered that if I was frugal with my cutting I could make two bags with one package of fat quarters. Then I also had the watermelon fabric (again a fat quarter package) and thought it would be great for a bag as well. They are lined and also have fusible batting in them. I made four of these bags - gave away two so far. I still have a couple of packages that I think would be great for these bags - some cat prints and chicken prints. These bags are about 19" wide and 26" long.
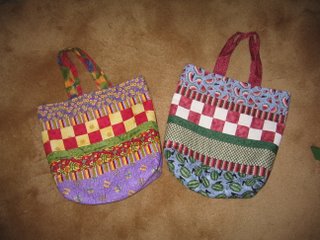
Now I have to go off to the quilt store and get some applique pins for this Dear Jane - I have never bought applique pins - just used my regular yellow headed ones - but these pieces are so tiny that I need smaller pins.
And a big thank you to Patty as I moved these pictures around and put them just where I wanted!
No comments:
Post a Comment